" The amateur is afraid of boldness, the professional is afraid of timidity." Edgar Whitney
My Methods
There are as many methods as there are artists. As long as it is technically sound, there is no "right" or "wrong" way to work. It is up to each artist to find what method works good for him.
So, here are some of the tools and tecniques that have worked for me......
Supplies and Methods: Always have a small sketchbook with which you can work out composition and values. Mine is only 4"x6".
Oils
(in the studio)
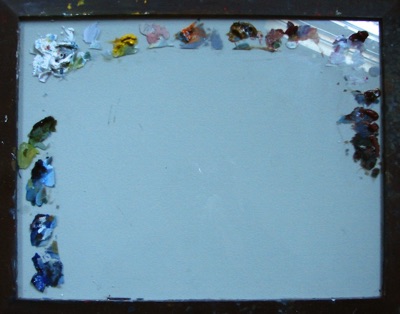
Palette: My palette is one I made from an inexpensive 16x20 frame and a grey piece of mat board. The glass on top is wonderful to mix oil paints on and cleans up easily by scraping with a one sided razor blade. I reinforced the whole thing by screwing a 1/8" piece of plywood onto the back, so there would be no torquing.
Colors: I use Grumbacher and sometimes Winsor Newton professional oil paints. Although "student grade" paints are cheaper, they also have less pigment in them and so you wind up having to use more paint to do the same thing. It is easier to get good work with good paints.
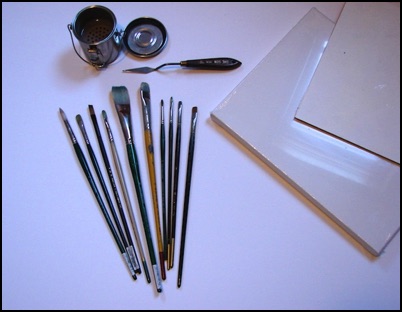
Brushes:Over the years I have collected a sinful number of oil brushes and when they are well taken care of, they will last for many years. A few of my larger brushes are 30 years old!
Assorted Flats, Brights, Rounds, and Filberts of various sizes. The bigger the canvas, the bigger the brushes I use, and vice versa. The only way to find which brushes work for you is to try them out. Years ago I used mostly round bristle brushes. But now I use more flats and brights than anything else.
Brush cleaner for mineral spirits or odorless turpentine.
Painting knife for scratching into the paint or applying paint.
Support: Stretched canvas or gessoed board.
Rags: old T-shirt, diapers, cotton scraps etc. for wiping brushes, canvas, and hands.
Basic Steps - I usually make 4-5 passes over the whole painting with drying time in between.
I paint at a sturdy, full size easel with my palette, brushes, mineral spirits, and mediums on on a table in front of me. I only need to reach down to get whatever I need.

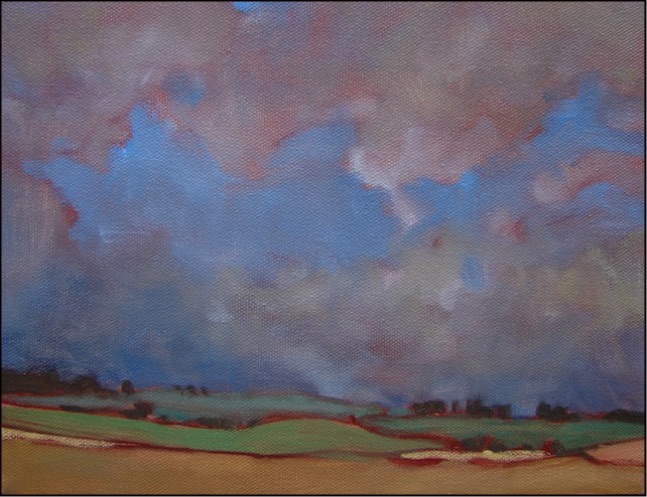
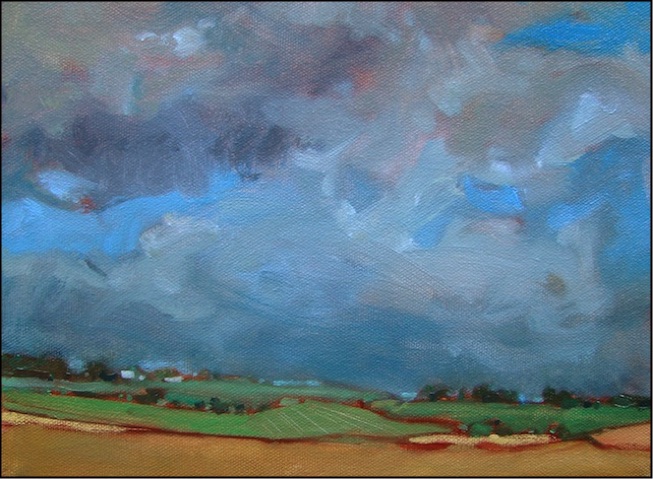
1st pass: Lay down a color for the ground. Sketching with a medium size brush, I quickly draw in the broad shapes to establish composition.
2nd pass: Freely paint in the basic colors. No details yet!
3rd pass: At this point I slow down and begin to make more critical decisions about color, value, composition changes, what's working and what's not. I may add a few details, but still avoid tiny details. You can still see some of the original ground color and sketch through later layers of paint.
Final pass: Continue to break areas into smaller units with color and value changes that will create the feel and visual language needed. You can still see some of the first wash of paint showing through. Final details and some changes made. I changed the direction of the furrows in the foreground field to make a more balanced design to lead the eye back into the painting.
My colors are set up like a color wheel on my palette.
Starting at the left: Ultramarine Blue, Cobalt Blue, Thalo Blue, Sap Green, Titanium White, Cadmium yellow light, Yellow Ochre (ran out of it on this palette), Cadmium Orange, Cadmium Red Light, Rose Madder, Alizarine Crimson, Burnt Sienna, Burnt Umber (don't always have this one on my palette), optional: Venetian Red